
Notification Scheduling allows you to automatically send your push notifications at a future date and time. With this feature, instead of sending a notification immediately, you can plan it to be delivered at the most optimal time.
How to Schedule a Notification?
To schedule a notification, you must first select the relevant application from the dashboard.
- Select your application from the main dashboard
- Click the Send Notification button
- Continue with the Manual Blank Notification option
Configuring Scheduling Settings
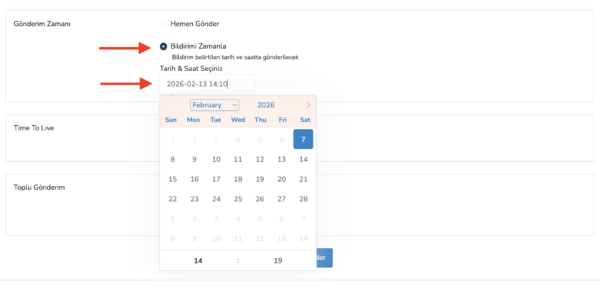
On the notification creation screen, after filling in the notification title, description, and other required fields, you can set the delivery time.
To schedule:
- Select the Schedule option under Delivery Time
- Choose the date and time for the notification from the calendar
- Complete the settings and send the notification
The scheduled notification will be automatically sent at the specified date and time.
Tracking Scheduled Notifications
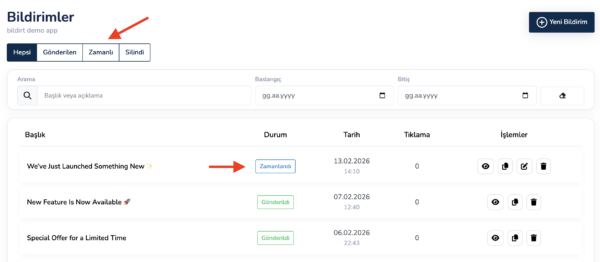
After sending, you can view summary information about scheduled notifications via the dashboard.
To see all scheduled notifications:
- Click the Notifications page from the left menu
- Check the listed notifications in the Status column
- View notifications with the status Scheduled
Editing Scheduled Notifications
You can make various changes to scheduled notifications before their delivery time.
- You can change the delivery date and time
- You can update the schedule
- You can delete the notification completely
These actions can be easily performed via the Notifications list.
Next Step
After learning how to schedule notifications, you may want to fully automate your notification workflows.
In the next section, we will cover the AI Autopilot feature under Scheduling & Automation.